This is a very easy to make quilted “rag bag” tote that is completely reversible – one side is a patchwork style quilted tote and the other side is a “rag bag” design.
Cut 27 squares of mix and match fabric that are 5” square. This is a great opportunity to use some of your stash! These 27 squares are for the outside (rag bag) part of your handbag.
Cut 27 squares of 5”alternative fabric for the inside of your tote bag.
Batting – Cut 27 squares of batting (I prefer Warm & Natural©) that are 4” square in size.

Figure out the design of fabric squares that you want - you will have 9 squares for the front, 9 squares for the back, 3 squares for each side, and 3 squares for the bottom. You will also need to figure out what pattern you
prefer for the inside of your bag because this tote is reversible.
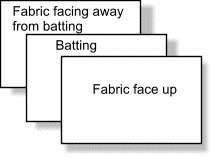
 Layer each one of your squares as follows: 1 layer of fabric facing out, 1
layer of 4” batting, 1 layer of your lining fabric facing out. Sew all 3 layers in a cross pattern,
leaving a 3/8” allowance as shown below.


Sew your squares together, 3 squares at a time. After sewing your 3 squares, sew your 3 sets of 3 squares together to form the front and then do the same for the back. Leave a 3/8” seam allowance.
Optional Pocket – If you would like, now is the time to add a pocket. Attach the pocket either on the bottom and sides of the “rag bag” side of your bag or the lining side, whichever you prefer. Leave the top open and sew a seam down the pocket, dividing it into 2 parts. Short side measures 7 ½” and the long side measures about 13½”.
Attach the sides and the bottom of your bag. Attach the back. Cut 2 handles for your bag 6” wide by 25” long.

Fold handles in on both sides then fold toward center again. Sew down each long side as close to the edge as possible.

Attach a piece of bias trim to the top of your bag measuring 35” long. Use double fold bias tape 7/8” wide. Do you need help with the binding? We have a binding tutorial located at Henriettas Handbags
Fold under both ends of your 2 handles by about ½”.
Position your handles about 1” in from each side and 2” down from the top.

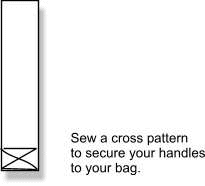
 Attach handles in a cross pattern to your handbag.
Trim extra threads off your bag.
Wash in cold water on gentle cycle. Dry in dryer on low. Trim extra threads again.
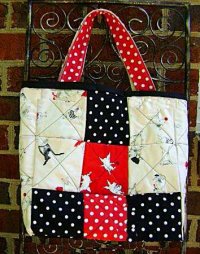
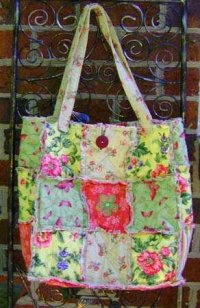
This is the finished product (the quilted side is on the left, the rag bag side on the right).


Henrietta's Handbags have simply hundreds of great patterns for making handbags. Why not have a look today?
Free Sewing Course

We have put together a 6 part Sewing Course which shows you, step by step, how to create some fabulous items that you can use as gifts, to decorate your home, or even sell to bring in some extra cash.
To sign up for your free Sewing Course, just enter your first name and email address below, and click the button below.
Sorry - temporarily unavailable.
We value your privacy, and promise never to give or sell your information to any third party. See our detailed privacy policy here.
Support Our Site
If you have found the information on our site useful, we would like to ask you to consider a donation to help us maintain this site. Thank you!
